Tuesday, September 22, 2009

Merkava Mk 4: Work-in-progress 5

Managed to get a considerable amount of work done over the super long wkend(including added leave 2day for me....:D)...

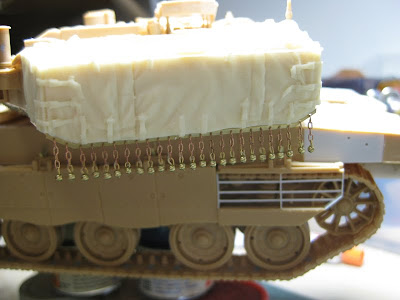
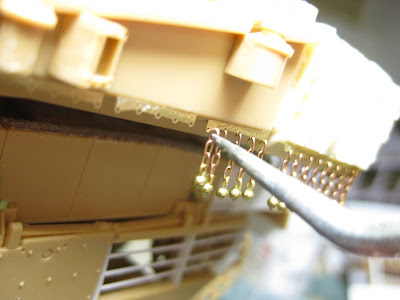
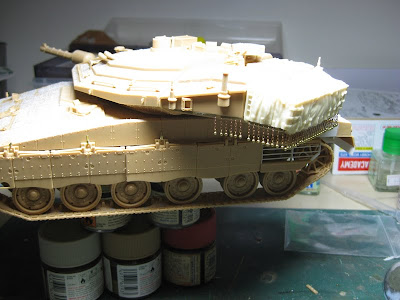
Ball & chain armor was completed sat morning... Followed by primer of entire model to check for any irregularities....found some & corrected them.


Adding primer also helps the paint to adhere better.


Preshading of the panel lines. This time round I decided not to spray entire model black, only the corners, panel lines, & recesses recieved the black shadows.

Base color after much highlighting and ligtening of the base color. This time round, the color scheme was shifted away from my usual predominant greyish tone, toward a more khaki sand tone. Of course the color now is much lighter, however, this will be toned down in subsequent weathering steps.
Post shading done to enhance the shadows, decals added and the turret basket airbrushed. rubber tires & the rubber skirtings painted as well.

I've already begun adding the filters, a brownish grey tone... (pic above is without filters)
Next steps:
-Sand filters, umber filters...& many other combinations...can't tell now coz i won't know what i'll use later...keke..:p
-Pin washes
-Paint chipping
-Rust/dirt streaks,
-Weathering tracks, etc...the list goes on...
Good nite folks!

Sunday, September 13, 2009

Merkava Mk 4: Work-in-progress 4

Some quick updates....

Started on the final, toughest & most tedious parts of the construction...the BALL & CHAIN ARMOR CURTAIN!!
The rear portion was completed at 3.30pm today...
Took an afternoon nap, went church, dinner & kopi with Ah Kok @ Ikea b4 continuing it at 10.55pm....
One little step at a time....1 ball/1 chain hooked on...1 ball/1 chain hooked on...and the story continues...

Ball & Chain armor 75% completed

The junk i use to gimme the height i need on the model to get the chains hooked on...


Ball & Chain to be continued....
Good nite folks...
Brandon

Saturday, September 12, 2009

Merkava Mk 4: Work-in-progress 3

Hi folks,
Some more updates on the build... assembly's almost done (85%)

I did some modifications to the last panel of the side skirts on both sides. As you can see below, the vertical frames are too thick for 1/35 scale, so are the horizontal rods. So....
Left panel: 1st 2 vertical beams & the rods removed, leaving only the last in place for me to gauge the height & shape as well for the replacement beams & rods.
The right side panel in process of being removed & you can see the replacement vertical beam(white color) which is much thinner & more to scale.

The replacement rods: The centre vertical panels were drilled through & the replacement plastic rods, 0.5mm diameter, were slotted in.
The completed modified panel. Looks more to scale.

The modified panel attached to the hull.
Close up of left side panel.
Close up of right side panel
The anti slip surface applied to all the horizontal surfaces. As per the previous build(Merkava mk3), the texture was applied in the same manner. A total of 02 layers applied.